Library
Automation Rules
Automatically clean up creator naming conventions as files enter your library — or apply a rule set to files already there — with a full preview before anything changes.
Updated
Creator download packs come with wildly inconsistent naming: one folder called “32mm”, another called “Presupported”, files named STL_HOLLOWED_LYS_Brodmada_base_scenic_supported.stl. Automation Rules cleans that up so everything lives under a consistent shape. It’s a Pro feature, it only ever touches file and folder names (never file contents), and you always see a full preview before anything changes on disk. Rules can run at two points: when you import a folder, and retroactively on files already in your library.
Also please forgive me for all my examples and presets I ship with the app, I only resin print miniatures and dnd stuff pretty much so all my examples and rules are based around files downloaded in that space haha.
Picking a rule set in the import dialog
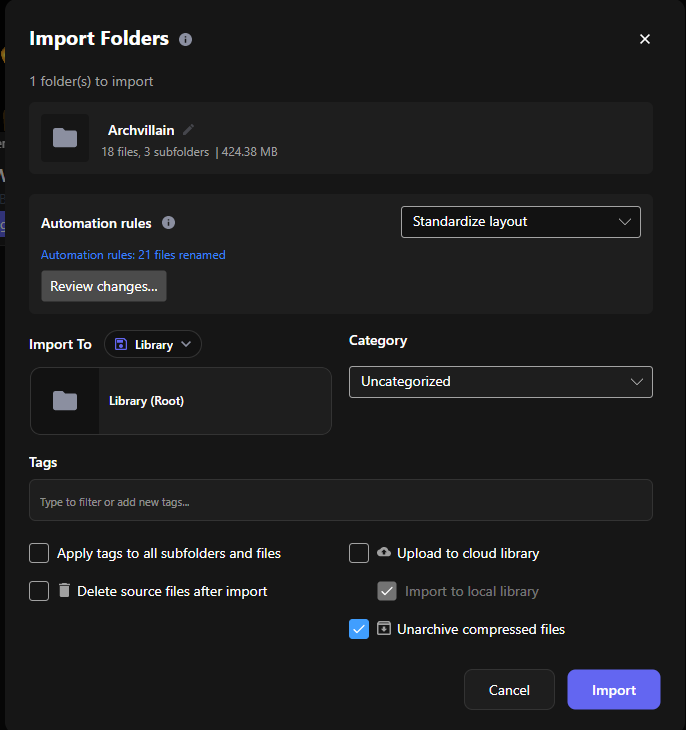
When you import a folder, an Automation rules section appears below the file list in the import dialog. The dropdown is preselected with whatever you chose as your default in Settings; you can change it per import or set it to None to skip cleanup for this batch.
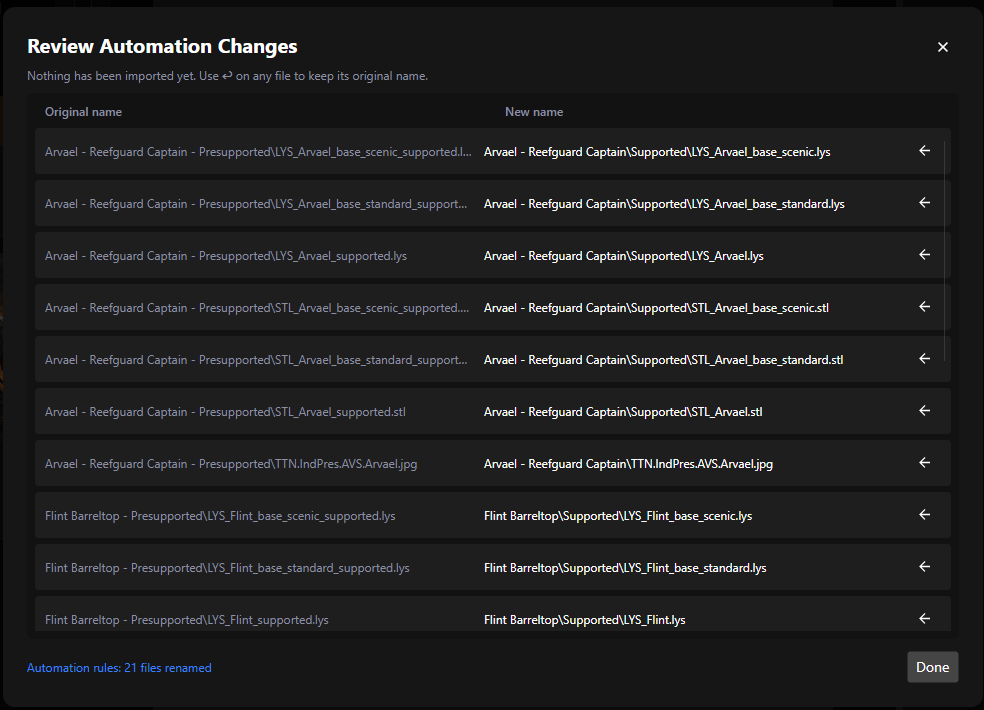
Once a rule set is selected, a summary line shows how many files would be renamed. Click Review changes… to open a full before-and-after list — every rename is shown, with a warning icon on any file the rule can’t process cleanly and an undo arrow to opt individual files back out.
The three built-in presets
So at least at the moment I’ve included three presets, but they likely only apply to the users that are hoarding miniatures, at least I don’t know how creators outside that space package and ship their files. But I made three rules everyone can look at and duplicate, modify, etc. into their own rules for their own workflows.
Standardize layout is my big one to try and show a more complex ruleset. It targets the standard creator archetype where support state lives in redundant folder names and file name prefixes, and reorganizes everything into a clean Set → Supported / Unsupported → files shape.
Simple name cleanup is information-preserving. It only removes a support token from a file name when a folder above it already says the same thing — redundancy removal, never information removal. Folder names are never touched. A file whose support state is only in its own name keeps it.
Minimal tidy is purely cosmetic: underscores become spaces, and runs of extra whitespace are collapsed. Nothing is moved, nothing is removed.
Automatic renaming via File Explorer
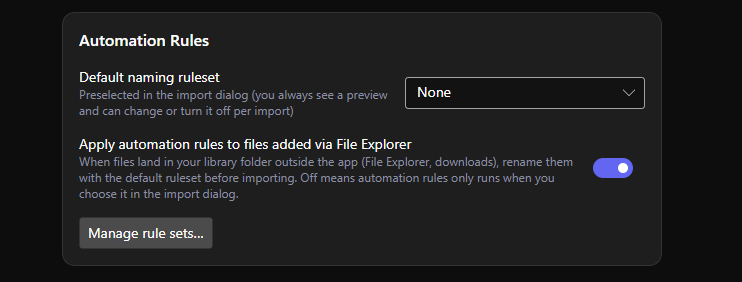
You can also have the default rule set apply to files dropped into your library folder outside the app — from File Explorer, a download manager, or a slicer export. This is off by default.
To enable it: Settings → Import → Automation Rules → Apply automation rules to files added via File Explorer (toggle). There’s no per-drop preview, so it’s worth testing your rule set with Review changes… in the import dialog or the manage rule sets dialog.
Running a rule set on files already in your library
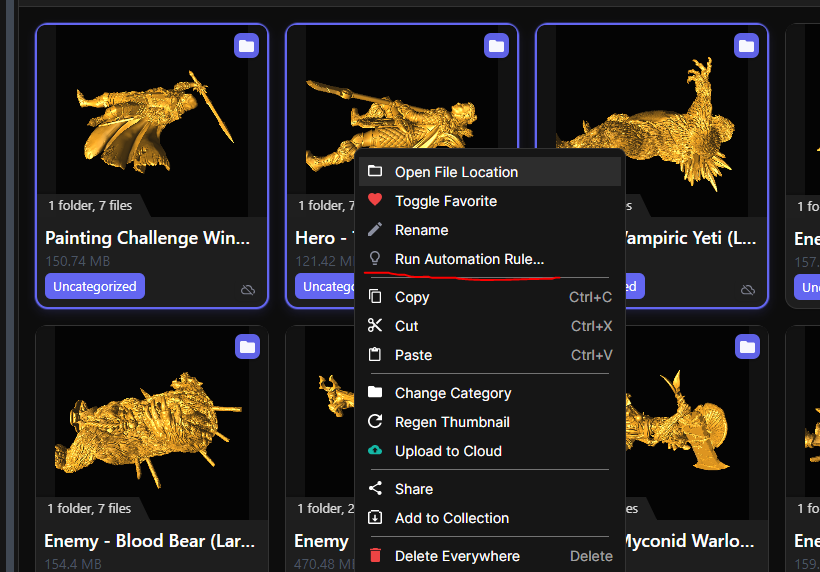
You don’t have to reimport to get rule-set cleanup on a batch you imported before you built the rule. Right-click any folder or file card in the Library view and choose Run Automation Rule…. The command works on multi-selections too — selected folders include everything inside them.
Cloud-synced files and shares
If any files in the scope are synced to the cloud, the dialog shows a banner: “Cloud copies will be renamed server-side — nothing is re-uploaded.” Renaming moves the cloud key; your file data doesn’t go anywhere. You may see activity in the sync status indicator after Apply — that’s key bookkeeping and keeping cloud names and locations in sync with your local ones.
Building your own rule sets
Click Manage rule sets… (in Settings → Import → Automation Rules) to open the rule set editor. You can also get there from the import dialog picker via Edit rule sets…
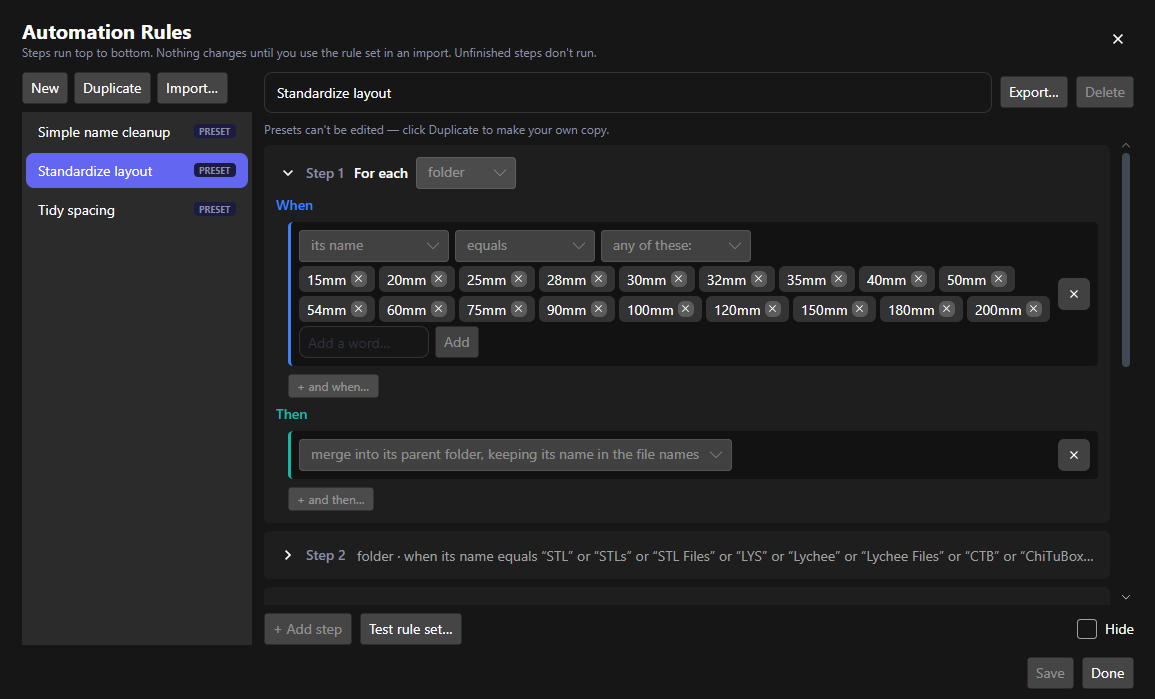
The editor shows the built-in presets on the left (read-only, but you can Duplicate any of them to start from a working base). Each rule set is a list of steps that run top to bottom.
How steps work
Each step reads as a sentence: For each [file / folder] — when [conditions] — then [actions].
All conditions in a step must be true at once in order for its corresponding then action to fire. Even if Step 1 conditions nothing is found to be true, it will still proceed through each step.
What you can check:
| Check | Available operators |
|---|---|
| its name | contains, doesn’t contain, equals, does not equal, starts with, ends with |
| its file type | equals, does not equal |
| its parent folder’s name | same as name |
| the name of any parent folder above it | same as name |
What you can do:
- remove those words from its name — strips the words the “contains” condition matched. Requires an “its name contains …” condition in the same step; without one the step shows a “won’t run yet” warning and doesn’t execute.
- move it into a folder called — moves the item into a named subfolder (created if needed).
- move it into a folder named after the matched word — useful for grouping by variant; also requires a “contains” condition.
- merge its contents into its parent folder — dissolves a folder, moving everything up.
- merge into its parent folder, keeping its name in the file names — same dissolve, but folds the folder name into each file stem so the information isn’t lost.
- remove repeated words from its name — collapses duplicate tokens.
- don’t import this file / don’t import its files — skips the item. Nothing is deleted.
Testing before you save
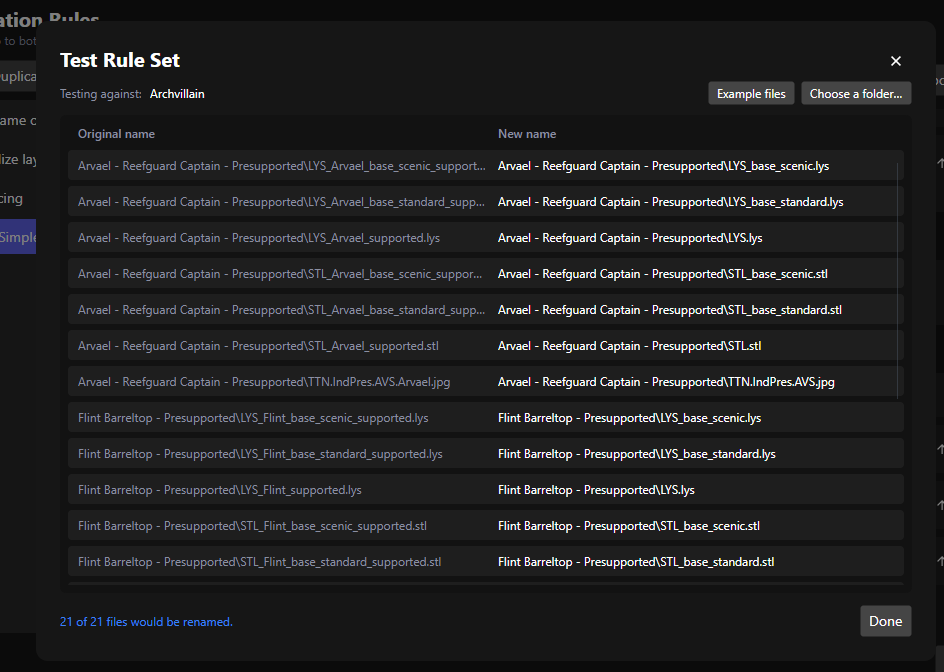
Click Test rule set… to open a before/after preview without leaving the editor. It runs against a built-in set of example files by default, or point it at one of your own folders (capped at 200 files) to see exactly what would happen to your real library.
Import and export
Custom rule sets can be exported as plain .json files and imported on another machine — handy for sharing a setup or keeping a backup. Use Import… and Export… in the editor toolbar.