Printing
Build Plates
Plan prints, arrange models, and track every plate's status.
Updated
Creating a plate
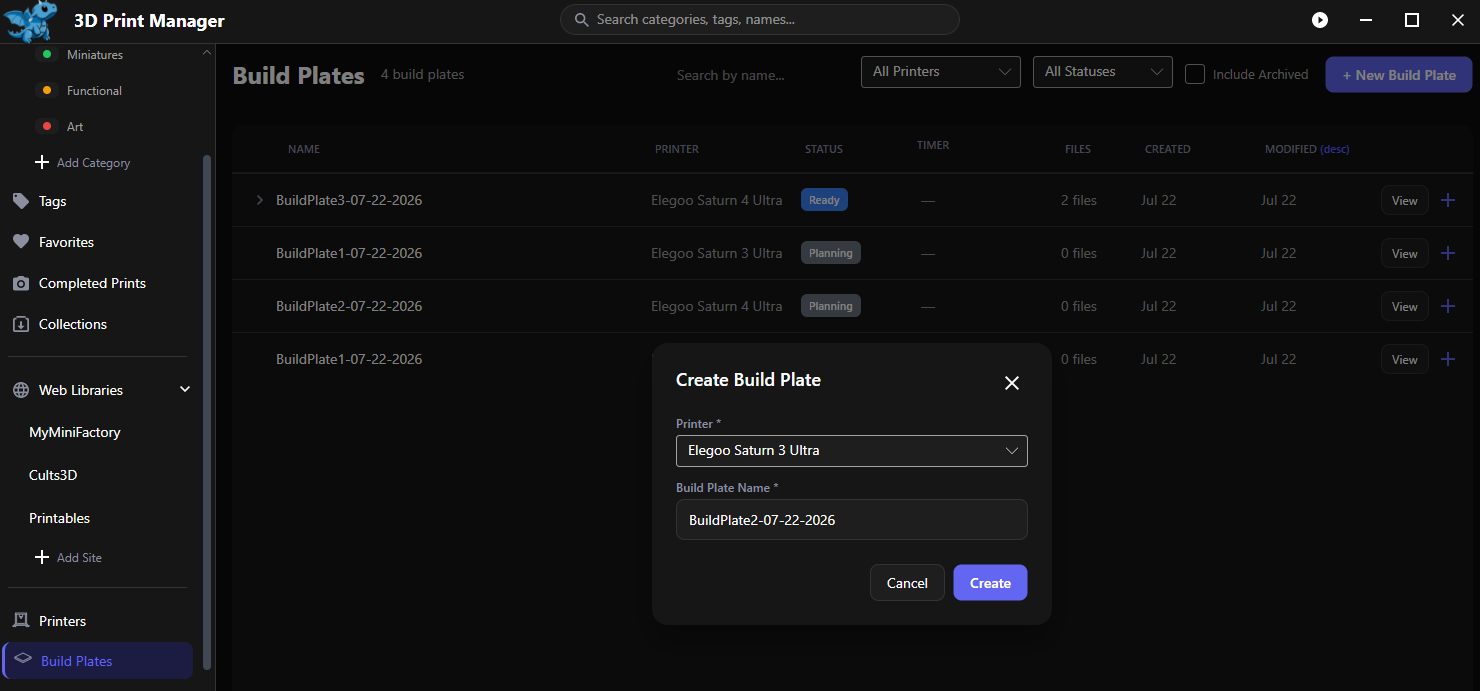
- From a build plates (+ New Build Plate) or the Build Plates overview (Create Build Plate — pick the printer and name the plate, e.g. “Goblin Army Batch 1”).
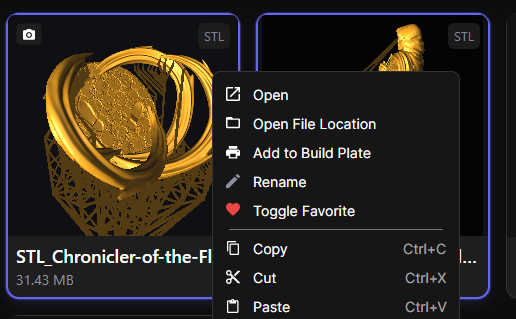
- From the library, right click a file or group of files and click add to build plate
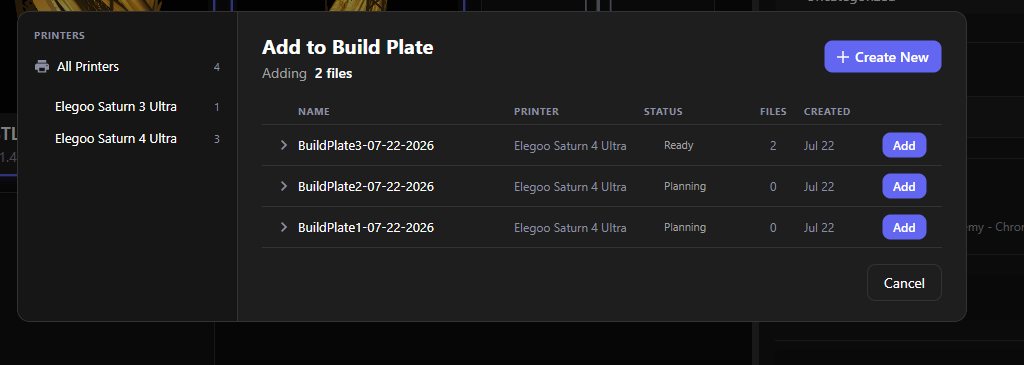
- From the library you can add to or create new build plates as long as you have printers created already.
Adding files
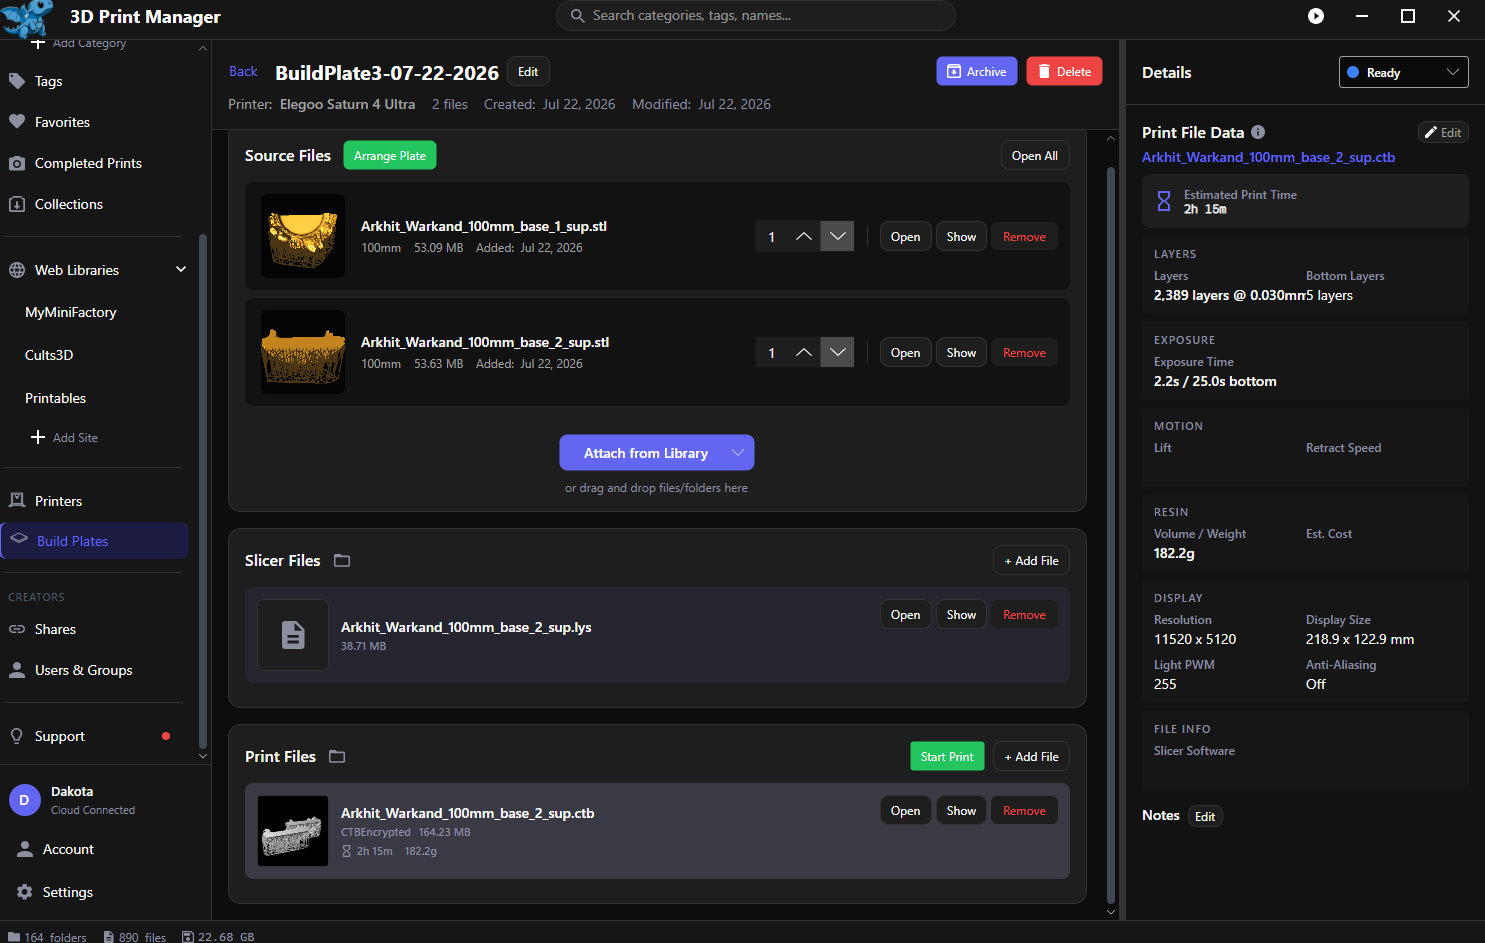
On the plate’s page, click Attach from Library to browse your library, use Import Files…/Import Folder… for files not in your library yet, or just drag and drop. You can also add libraries right to build plates from the library as mentioned above.
- When adding files from the library, the build plate will detect if it think it can fit the new file on it, and give you a warning if it thinks it can’t. You can bypass it and still add the file if you’d like to.
Files land in three sections:
- Source Files — the library models you plan to print, each with a quantity (1–999)
- Slicer Files — intermediate slicer projects and combined exports
- Print Files — the sliced output (.ctb, .gcode, etc.) that actually goes to the printer
Each of the latter two has a folder button to open its hot folder in Explorer — drop files there and they attach automatically.
Arranging the plate
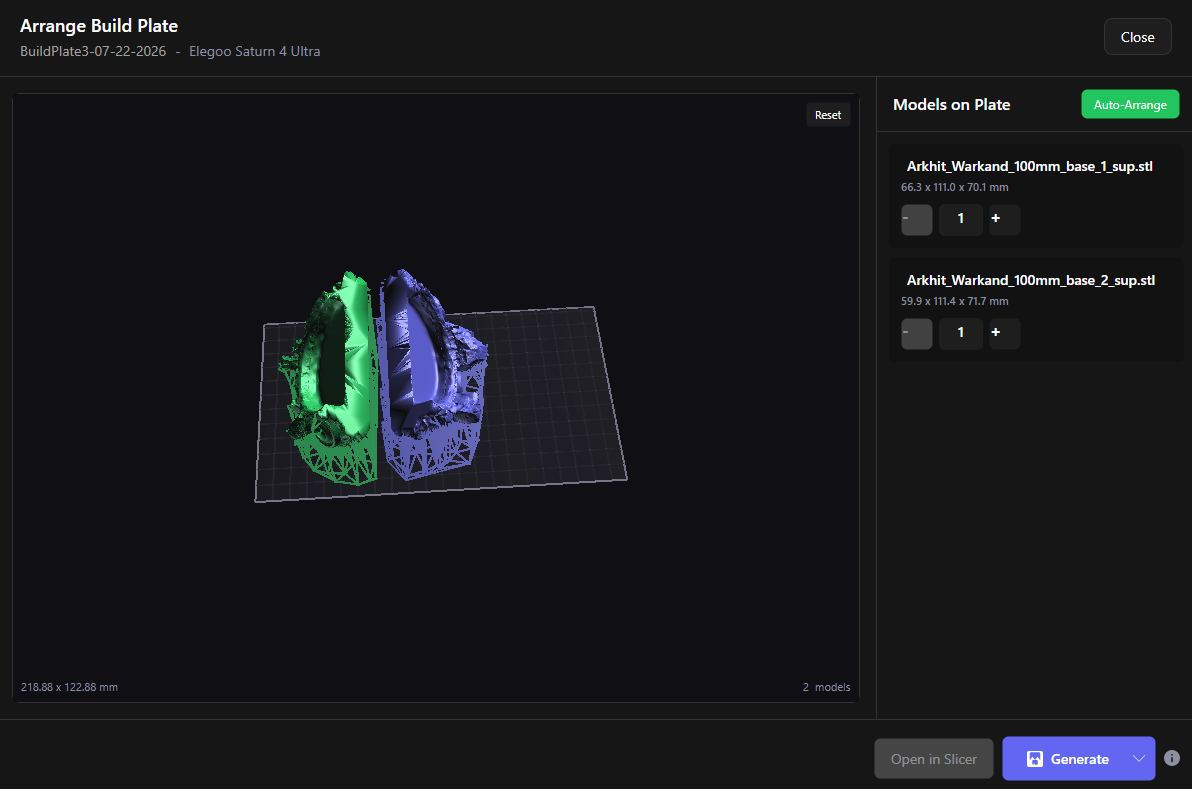
Auto-Arrange opens the layout view: your models on a 3D preview of the actual plate, with quantity controls per model. Auto-arrange packs everything within the build volume. Then:
- Generate STL — one combined STL of the whole layout
- Generate 3MF — keeps models separate with placement (currently confirmed to open correctly in PrusaSlicer; use STL for other slicers or risk it cause you live dangerously)
- Open in Slicer — send the result straight to the printer’s slicer
Generating very large combined files (over 500 MB) gets a heads-up first, since slicers can struggle with them.
Print status and timing
Move plates through statuses: Planning → Ready → Printing → Completed/Failed. Click Start Print and the plate shows a live Elapsed / Remaining timer (remaining comes from the sliced file’s estimated print time). Finish with Complete or Failed — failed plates offer a Retry.
You can also add your own statuses in Settings → Printing → Build Plate Statuses.
Print file data
When you attach a sliced file, the app reads its metadata and shows it in the Print File Data panel: estimated print time, layer counts, exposure settings, lift/retract motion, and resin volume, weight, and estimated cost. See Slicers for supported formats. Although different slicers seem to populate metadata with varying degree’s of accuracy here, so be aware of that!
The overview
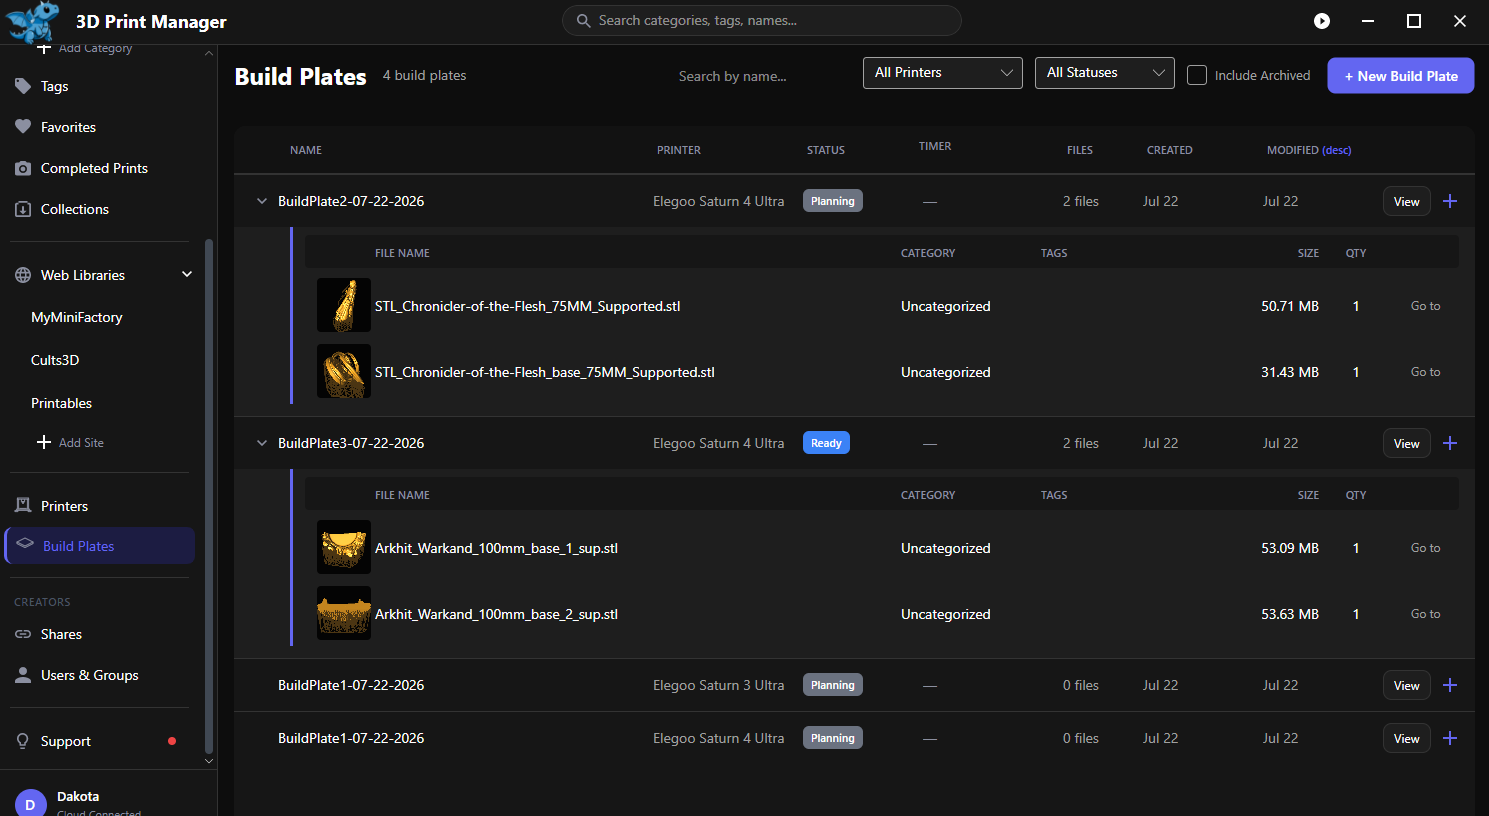
Build Plates in the sidebar lists every plate across all printers — sortable, filterable by printer and status, with expandable rows showing each plate’s files and a Go to jump into the library. Old plates can be archived and hidden behind the Include Archived checkbox.